Oh Sew Boho Chic!
Hello!! I'm so thrilled to be through to the penultimate challenge of the Refashion Runway!!
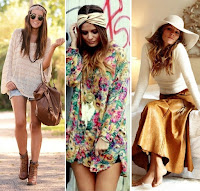
 Thank-you for your votes, whoever you voted for - although it was a shame to see Marisa go, with her creative flair... Now there are four of us, all hoping to make it through to the final week... so - what is it THIS week? Boho Chic... And the blogpost soundtrack for today? A lesser-known track by The Bangles, cos after making this, I'm going down to Liverpool to do nothing! (*actually, it's for a wedding, but there won't be any sewing involved...)
And for 'the rest', I can't say I went with the first thing I found..! I toyed with various pieces, many of which will be future refashioning projects - but for now they didn't fit the bill! So here's a Before shot, of the three pieces I eventually used... A leather jacket, a cotton dress, and a pair of flared trousers.
I do love the comfort of a maxi skirt - but I'm not that keen on flared trousers (as you can see, they don't do my already-large thighs any favours!) - so when I found this incredibly soft pair of paisley 70's-inspired pants, I thought they'd make an even better skirt. This was the easiest of all the pieces to rework, so I'll start here... (*also, in the interests of brevity, I'll be cutting to the most important parts of the remakes, otherwise this will be a VERY LONG POST!)
They had a wide elasticated waistband, which I kept. As they were XXL in size, but the perfect length, it was just a case of opening up the inside seam of the trousers, and fixing into a skirt, whilst also altering the size of the waist at the same time.
I sewed a new seam straight down the centre back (making sure to fit on 'the model', to account for the sticky-outy-ness of my behind), and then sewed a running stitch halfway down the front seam to create a front slit - and therefore, a more comfortable skirt to walk in. I also folded the front overlocked edge inwards (that was already part of the garment). and secured with a straight stitch.
Onto the white top! I wanted something plain to go under the waistcoat, so started with this white dress;
I halved the garment lengthwise, and fitted the bottom half onto my torso, forming a 'loop' of fabric - or in other words, a boob tube. In doing this, the side seams moved to the back of the top - in what looks like three segments of a chocolate orange (to me anyway!). I didn't mean for this to happen - but it does mean I can wear it looking like a sectioned corset, if I want to. This is much better to show than describe, but I was against the clock - so here are some pics of what I did in the playing around stage! (*and remember, in doing this, I was looking to make something that would compliment, not detract from, the waistcoat)
Once I'd formed the basic fitted boob tube shape, I created a thin band; both to keep the boob tube up (!), and to finish the garment properly (and not just have a basic cut edge). I used a technique I learned in making the Plaintain top. Basically whilst I was sewing them together, I stretched the top to fit the smaller length of the neckband, meaning it does the job of holding the top in place.
And sew to the main piece, that drove the entire boho chic outfit! I started with a beautiful brown leather coat - SO SOFT!!
I knew I wanted a waistcoat, so started by removing the collar, sleeves, and lining...
What I hadn't reckoned on, was finding the inside of the leather would be even softer than the outside! So I mimicked the workmanship on the existing inside seams of the coat, creating a new centre seam down the back, which also did the trick of taking the waistcoat down a couple of sizes.
I also removed the button placket, and took it up at the shoulders, and side seams, before using the arms (cut off previously) to create a fringed panel, to attach to the front. My preferred waistcoat on my Pinterest page was the suede Biba number;
By playing around with the panel, I set it at an angle, so that mine would also fall in a similar manner at the front...
The fringing was straight forward; as leather doesn't fray, I merely used the ruler at 5mm intervals to slice equal lengths into the piece of leather... I found it quite satisfying to do, relaxing even!
So - a few things to share, before I reveal the final outfit... Firstly, if you're going to do something like this, the one thing I would say is, watch your needles! I was alternating between garments (depending on what seemed the most pressing thing to do) - and each of the pieces required a different needle... You'd think it wouldn't make much of a difference, but the ballpoint needle was a godsend for the lycra trouser/skirt, and the leather needle was crucial to avoid tearing the waistcoat (which would be near-impossible to mend). I would say keeping tabs on which needle was which, was challenging! If you have any tips to share, on how to label a needle, I'm all ears :) I was considering painting the end with nail polish, a colour coding system, if you will! (and I don't mean the pointy end, haha!)
Speaking of leather, I also used some weights to set the seams open, and then fabric glue to secure (just like the original tailor had). I figured, if they used glue, I will too. This is one of the ways I learn right from wrong, checking what's already going on inside professionally made garments! And finally, you can see from the pic above, there were SO many off-cuts from the original pieces, I will definitely be using them in future projects; for example, I was going to make a necklace to wear from the white dress, and ran out of time...
SO! A quicker reminder of the BEFORE garments!
And some collages so you get a better view from the front - although Rod is much more fascinated with a canoe on the river, obviously. :)
And the Before and Afters, all in one place...
I'm now starting to think about the final challenge, 'Assymetrical' - what would that make YOU think of..?
And whilst I worry myself with that (!) - remember to cast your vote for this week's Boho Challenge, I can't believe I made it to THE FINAL FOUR!! I just want to reiterate, as always, I've loved being part of this competition - especially seeing all the other creations on a weekly basis, it's fabulous getting to see how people creatively interpret the same word, or phrase.
I honestly feel I've added some really wearable pieces to my wardrobe over the past few weeks, and although I've done it in timed conditions (!) - without that driving force, I'm not convinced I would've made so much, in such little time. This 'Boho Chic' outfit, in particular, will be getting a lot of wear, as it's just so comfortable! Not sure about the hat I wore for the pics, because I'm not really that 'put together'...but the rest of it is so low maintenance, I know I'll be getting my money's worth, all £15 of it! :D
See you next week - can't wait!
Gema x


Love the pics too, Gema. I think the stormy overcast background is kinda neat. Also, I like reading everyone's tutorial on their blogs... it's so much more in-depth. We just get the very summarized version on Beth's page. I'm always so impressed by how much work everybody puts in to their pieces after reading their blog tutorials. Good work :)
ReplyDeleteHa! I don't think you think the overcast background was neat if it was your summer ;) We want more sunshine!! (please send some over, thank-you in advance x)
DeleteAnd I agree with you - I worry I'll bore people silly on Beth's site (here too, actually...) - but I love seeing the finer details on everyone's own sites. Just about to comment on your top - so much work!! And so neat...! X
Gema, your creativity never seizes to amaze me!
ReplyDeleteThat waistcoat is a perfect centerpiece of an outfit! Gotta look to make me something like that, it looks amazing.
P.S. Can you explain some details of working with leather? I've never done it and I'm a little intimidated. Are there any clever tricks? Also, what sewing machine and needles are you using?
You are lovely! I think everyone's creativity is amazing...just love opening that e-mail on a Saturday :) As for working with leather, I went online and found so many great tutorials (with experts, which I'm not!) - but, as a starting point, here are a few things...
DeleteLeather doesn't fray, so doesn't require the same finishing techniques on seams - not even pinking shears. Having said that, it can't be pinned in place - as that creates a 'fault line' which can easily tear. I think that's also the reason why the seams are opened up, and glued back, to help strengthen the join. Some people use a special teflon foot on the machine (as it can drag when sewing) - but you can easily stick a piece of tape to a normal foot to help it slide...or use a walking foot... But my machine is just a 'normal' sewing machine, and doesn't struggle with it :)
I'd also suggest working with UPVC first, as a tester, so you get a feel for how it works (and it's much cheaper to make mistakes that way) - I've made loads of wipe-clean bibs, and it was a great way to prep for leather (which was, in all honesty, a little terrifying!!). Such beautiful fabric, so hard to cover up mistakes.......
And there are leather needles, which I believe are the same you'd use for denim... I'll look into my stash, and get back to you! X
Another masterpiece by my creative, genius of an off-spring. Love it. It reminds me of the seventies. All the very best of luck to you my love. Come you guys - Vote For Gem !!!!!
ReplyDeleteThanks Mum, love you x
DeleteLove the leather vest and the whole look. You did such a great job and you impress me every single week, I can always count on you to post amazing refashions every week!
ReplyDeleteI just pasted something strange from my phone!! Here's what I meant to say! :)
DeleteSarah! Your craftsmanship is incredible, and you always look so gorgeous in your pics! I love everyone's finished pieces, it's amazing to me how talented everyone in the Refashion Runway lineup has been (and I'm astounded I'm still in it!!).