Another Way with Chambray!
Some details about this garment then; this is a Cotton Trader shirt dress, with buttons through the front, and a matching tie for the waist. Altho' a lot like denim to look at, this dress is made from chambray - so is similar, but much softer and lighter.
I spotted a few dresses on Pinterest and, as per usual, made my own page for inspiration. The good thing about the denim look is, it's ALWAYS in fashion. Every year there are pages and pages of fashion magazines dedicated to the 'resurgence of denim'... "It's Back!"... "Hot off the press, Kim Kardashian does denim!" (*change celeb name as applicable)... So there's a good argument for making something wearable, and classic, from this dress - hopefully I'll be able to wear it until it falls apart, in the name of fashion! Actually, I saw this a couple of months ago in Grazia, as you look at it, try and guess how much it is:
Go on, guess! Well... It's a Max Mara shirt dress... when featured in Grazia it was priced at £305, it's now (as I write this) on sale, for £213. Bargain. Not. OK, I realise my idea of what a bargain is has become slightly warped by my time spent in charity shops... and this IS a classic, versatile, shirt dress - so maybe it's worth it? Either way, I've got work to do, on my own designer dress!
('House of Sequins and Slippers'? No, I know it's not catchy, let me work on that one...)
To start, I thought I'd try something I've seen other refashioners do with dresses, and use something that already fits me as a template. The dress I wore in this refashioning video is SO comfy, I often think it'd be great if I owned something similar in a different colour (and there's also something about the pleather bodice that makes it less 'me'...). So I took the dress, and put it on top of the larger denim dress, making sure to make it central (in terms of the side seams), using the waist as a guide.
I cut the denim dress an inch wider than the black dress, to account for seam allowances - and the chance I was wrong it would fit at all!
I then sewed the new dress up the side seams, put it on back-to-front, and continued to
Those of you with an eye for dressmaking will notice the apex of the darts is a bit off, and I think as a consequence I look a little 'wide in the girth', in the finished garment... those of you who are blissfully ignorant will (hopefully) think it looks fine, haha!
I cut the collar in half, tucked the new edges in, before sewing both up... and put these little babies to one side for later!
I also got it in my head I wanted to do proper facings for the bodice... so that was a piece by piece effort, again, using the off-cuts.
I planned to use the buttons that already ran through the front of the dress, as they were (now positioned down the centre back). The issue was that, owing to the softness of the fabric, there was a lot of gaping between each button, it just didn't give the proper fit I was looking for. I think in it's original loose form, the shirt dress would have worked well with buttons - but I decided to add a zip... and left the buttons inside, as an 'original feature'!
 |
| Inside! |
 |
| Outside! |
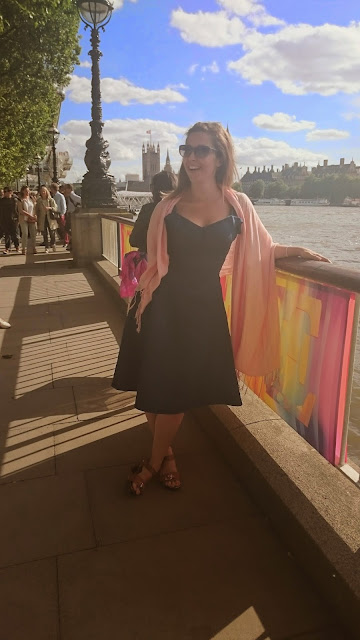
If the buttons prove annoying in future, sticking in my rear every time I take a seat, I'll address that by removing them and finish the back centre seam again. But I can honestly say it felt OK when we went out on our first adventure on the South Bank...
And if you're wondering where the shoulder straps came from, they were made from the original waist tie, easy!
As far as the collar was concerned, I positioned the points at the front, in the opposite direction to what they were originally, and sandwiched the collar pieces in-between the facing and the neckline of the dress before sewing up... hard to explain, much easier to show! And so...
I'm wearing it with a pink pashmina as it was a little blustery that day, blowing hot and cold! I realise that's not a particularly good pic, details-wise, so here she is, modelled by Dolly (and a little in need of an ironing, after our day out!);
and finally, the ultimate seal of approval from Rod, who promptly fell asleep on me whilst I was wearing it...
 |
| From Big Bertha to Big Ben... |
-------------------------------------------------------------------------
Ladies! If you're free on the evening of July 2nd, I'm presenting a short introductory session on refashioning, at a Little Big Swish in Ealing... Exciting, and nerve-racking, in equal measure! Come, swap your old clothes for 'new' garments, for free, and let's chat about refashioning!
Whatever you're up to, wherever you are, I hope the sun is shining -
Speak soon,
Gema x


Well done, looks lovely!
ReplyDeleteThank-you so much Therese! And lovely to have you stop by :)
DeleteIt's almost a shame the original button placket (is it even called that??) wasn't a feature on the outisde of the dress rather than hidden inside, as it could have looked really interesting bordering the zip. Great refashion all the same
ReplyDeleteI didn't think of that! I think, most of the time, I'm looking to achieve a shop-bought finish - in other words, the sort of thing that wouldn't attract the "Did you make that yourself?" question - so the 'clean' zip look lends itself to that... But you're right, it would look less RTW, and more designer, with the button placket in reverse! Maybe next time.... ;) Thanks for visiting, and commenting!
DeleteOh my goodness! That is so beautiful! Excited to see what you come up with on Refashion Runway!
ReplyDeleteI'm gobsmacked to be part of season three!! And thank you!!
DeleteAND!! Can't wait to see your creations too Kara !
Delete